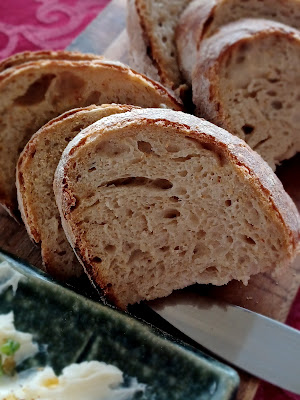
In 2020, COVID jumpstarted my forays into sourdough baking and my starter - that I was gifted from a friend - was named Dough-ba Fett. He flourished. I made boule after boule; I even used Dough-ba in English Muffins, Puff Pastry, and Croissants. But, after two and a half years, I murdered Dough-ba. Yikes! Well, it was really more of neglect than malice. And, when I went to grab Dough-ba's jar from the fridge, he was completely dried and a little bit molded.
I hopped into the Secret Sourdough Society to which I belong and asked if anyone local to me had some starter to share. I drove over, picked up the starter, and fed it as soon as I returned home. Then I fed and discarded throughout the week until my new starter was bubbly and vigorous.
In fact, he made quite a mess! It was just in time for making some boules before my mother-in-law and father-in-law arrived for a quick visit. I know she loves my bread. When I was actively baking boules all the time, I experimented with different flours and various add-ins.
I was going to rename this starter, but I really love the character Jake created for him. So, we will continue with Dough-ba Fett v.2.
Back to Basics Sourdough Boules
For this first baking, I decided to go back to basics. I used a mixture of all-purpose and Type 2 flour, but as soon as I get my hands on some rye flour, that will be added in as it's my favorite! Also, I use weight measurements, versus volume, when baking bread. It makes things more accurate and predictable.
Ingredients makes 2 loaves
- 200 grams sourdough starter
- 600 grams warm water + 50 grams warm water
- 600 grams all-purpose flour + more as needed
- 400 grams Type 2 flour (substitute rye flour or any other kind you prefer)
- 20 grams salt
- rice flour for sprinkling in Dutch oven
- Also needed: banneton proofing baskets or bowls lined with floured tea towels, Dutch ovens
Procedure
Place 200 grams of starter in the bottom of a large mixing bowl. Pour in 600 grams warm water. Use your hands to blend everything together so that all of the flour is moistened. Let stand for 30 minutes.
Pour in another 50 grams warm water, sprinkle in the 20 grams of salt, and gently knead the dough until the water is completely absorbed.
Now start the folds: rotating 90 degrees four times every thirty minutes for 4 hours.
Run your hand under warm water, grab one side of the dough and pull from underneath, folding it over the top of the ball. Rotate the bowl 90 degrees and repeat. Rotate. Repeat. And a fourth time so that the bowl has completed a full circle.
By the end of the 4 hours, the dough should be billowy and increased in volume. Note: if the weather is getting colder, it make take longer than 4 hours. Just be patient.
Lightly flour a workspace and use a dough scraper to divide the dough ball in half. Transfer the dough balls to the work surface. Lightly flour the banneton or towel-lined bowl.
Now repeat the folds, but with dry hands to shape the boules while creating tension in the top. Or, my lovely kitchen assistant does it so I can take photos of the process.
Keep the floured side of the ball down and fold from top to bottom four times while rotating the dough. This keeps the sticky side inside.
Flip the ball over and work the dough into a tight round. Let stand for 15 minutes. Repeat three times.
After the third shaping, place the dough ball, rounded side up, in the floured banneton.
Place boules in the fridge for 24 to 72 hours to proof.
When you are ready to bake, preheat the oven to 500 degrees Fahrenheit. Place the empty Dutch ovens (bottoms only) into the oven. When the oven reaches temperature - an in-oven thermometer is very, very helpful - let the oven stay at 500 degrees for 1 hour.
After an hour, remove the Dutch ovens and reduce the oven temperature to 450 degrees Fahrenheit. Lightly flour the inside of the ovens with a sprinkling of rice flour. Gently pull the dough away from the sides of the banneton and invert into the Dutch oven.
You can score the top with razors, but I have decided that I much prefer to let the loaf split and vent organically. Place the lid on the Dutch oven and return the pots carefully to the hot oven. Bake for 30 minutes.
After 35 minutes, carefully remove the lid and return the pots to the oven again. Bake for an additional 8 to 10 minutes, depending on how browned you like your crust.
The loaves should be firm and crunchy on the top, golden brown, and feel hollow when the bottom is tapped. Move the loaves to a wire rack and let cool for at least an hour before slicing! Enjoy.
My Butter Board Experiment
If you follow my blog or social media at all, you'll know how much I adore making cheese boards. So when I heard about the butter board trend, I was intrigued. It's not as complicated as a cheese board, really, it's just butter smeared on a board, topped with an assortment of toppings, and served with warm bread.
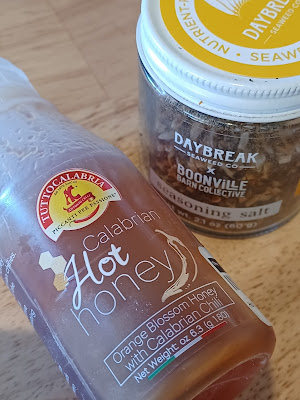
I went with a drizzle my butter with Calabrian hot honey, a sprinkle of seaweed seasoning salt, and some allium blossoms from the garden.
While this was a fun experiment, I am still partial to my olive oil and vinegar dipping bowl!


Comments
Post a Comment